Several years ago I purchased a Yardworks String Trimmer / Edger and a Hedge Trimmer along with a 20V 6Ah battery and charger. This year, the battery has deteriorated and it will only run for a few minutes. The lithium-ion cells inside the battery also seem to have expanded a bit so I think the battery is ready for retirement. The tools still work well - it's the battery that's the problem.
I did a bit of research and it seems that replacement batteries are simply not available any more for these Yardworks products. There are newer Yardworks products but they do not use the same battery. I did see some posts on the internet that the new Yardworks products work with DeWalt batteries.
I have some DeWalt tools that use the 20V Max and 20V XR batteries. The tools work well and replacement batteries will probably be available for a long time. You can even get cheap knock-off copies of DeWalt batteries if you are so inclined.
I decided to construct an adapter so that I could use the DeWalt 20V Max and XR batteries on the Yardworks tools. I also decided to have minimal effect on the Yardworks tools so that if a Yardworks battery was available I would still be able to use it.
So, I bought some parts -
Here's a picture of the parts. You can open the image in a new tab to see more details
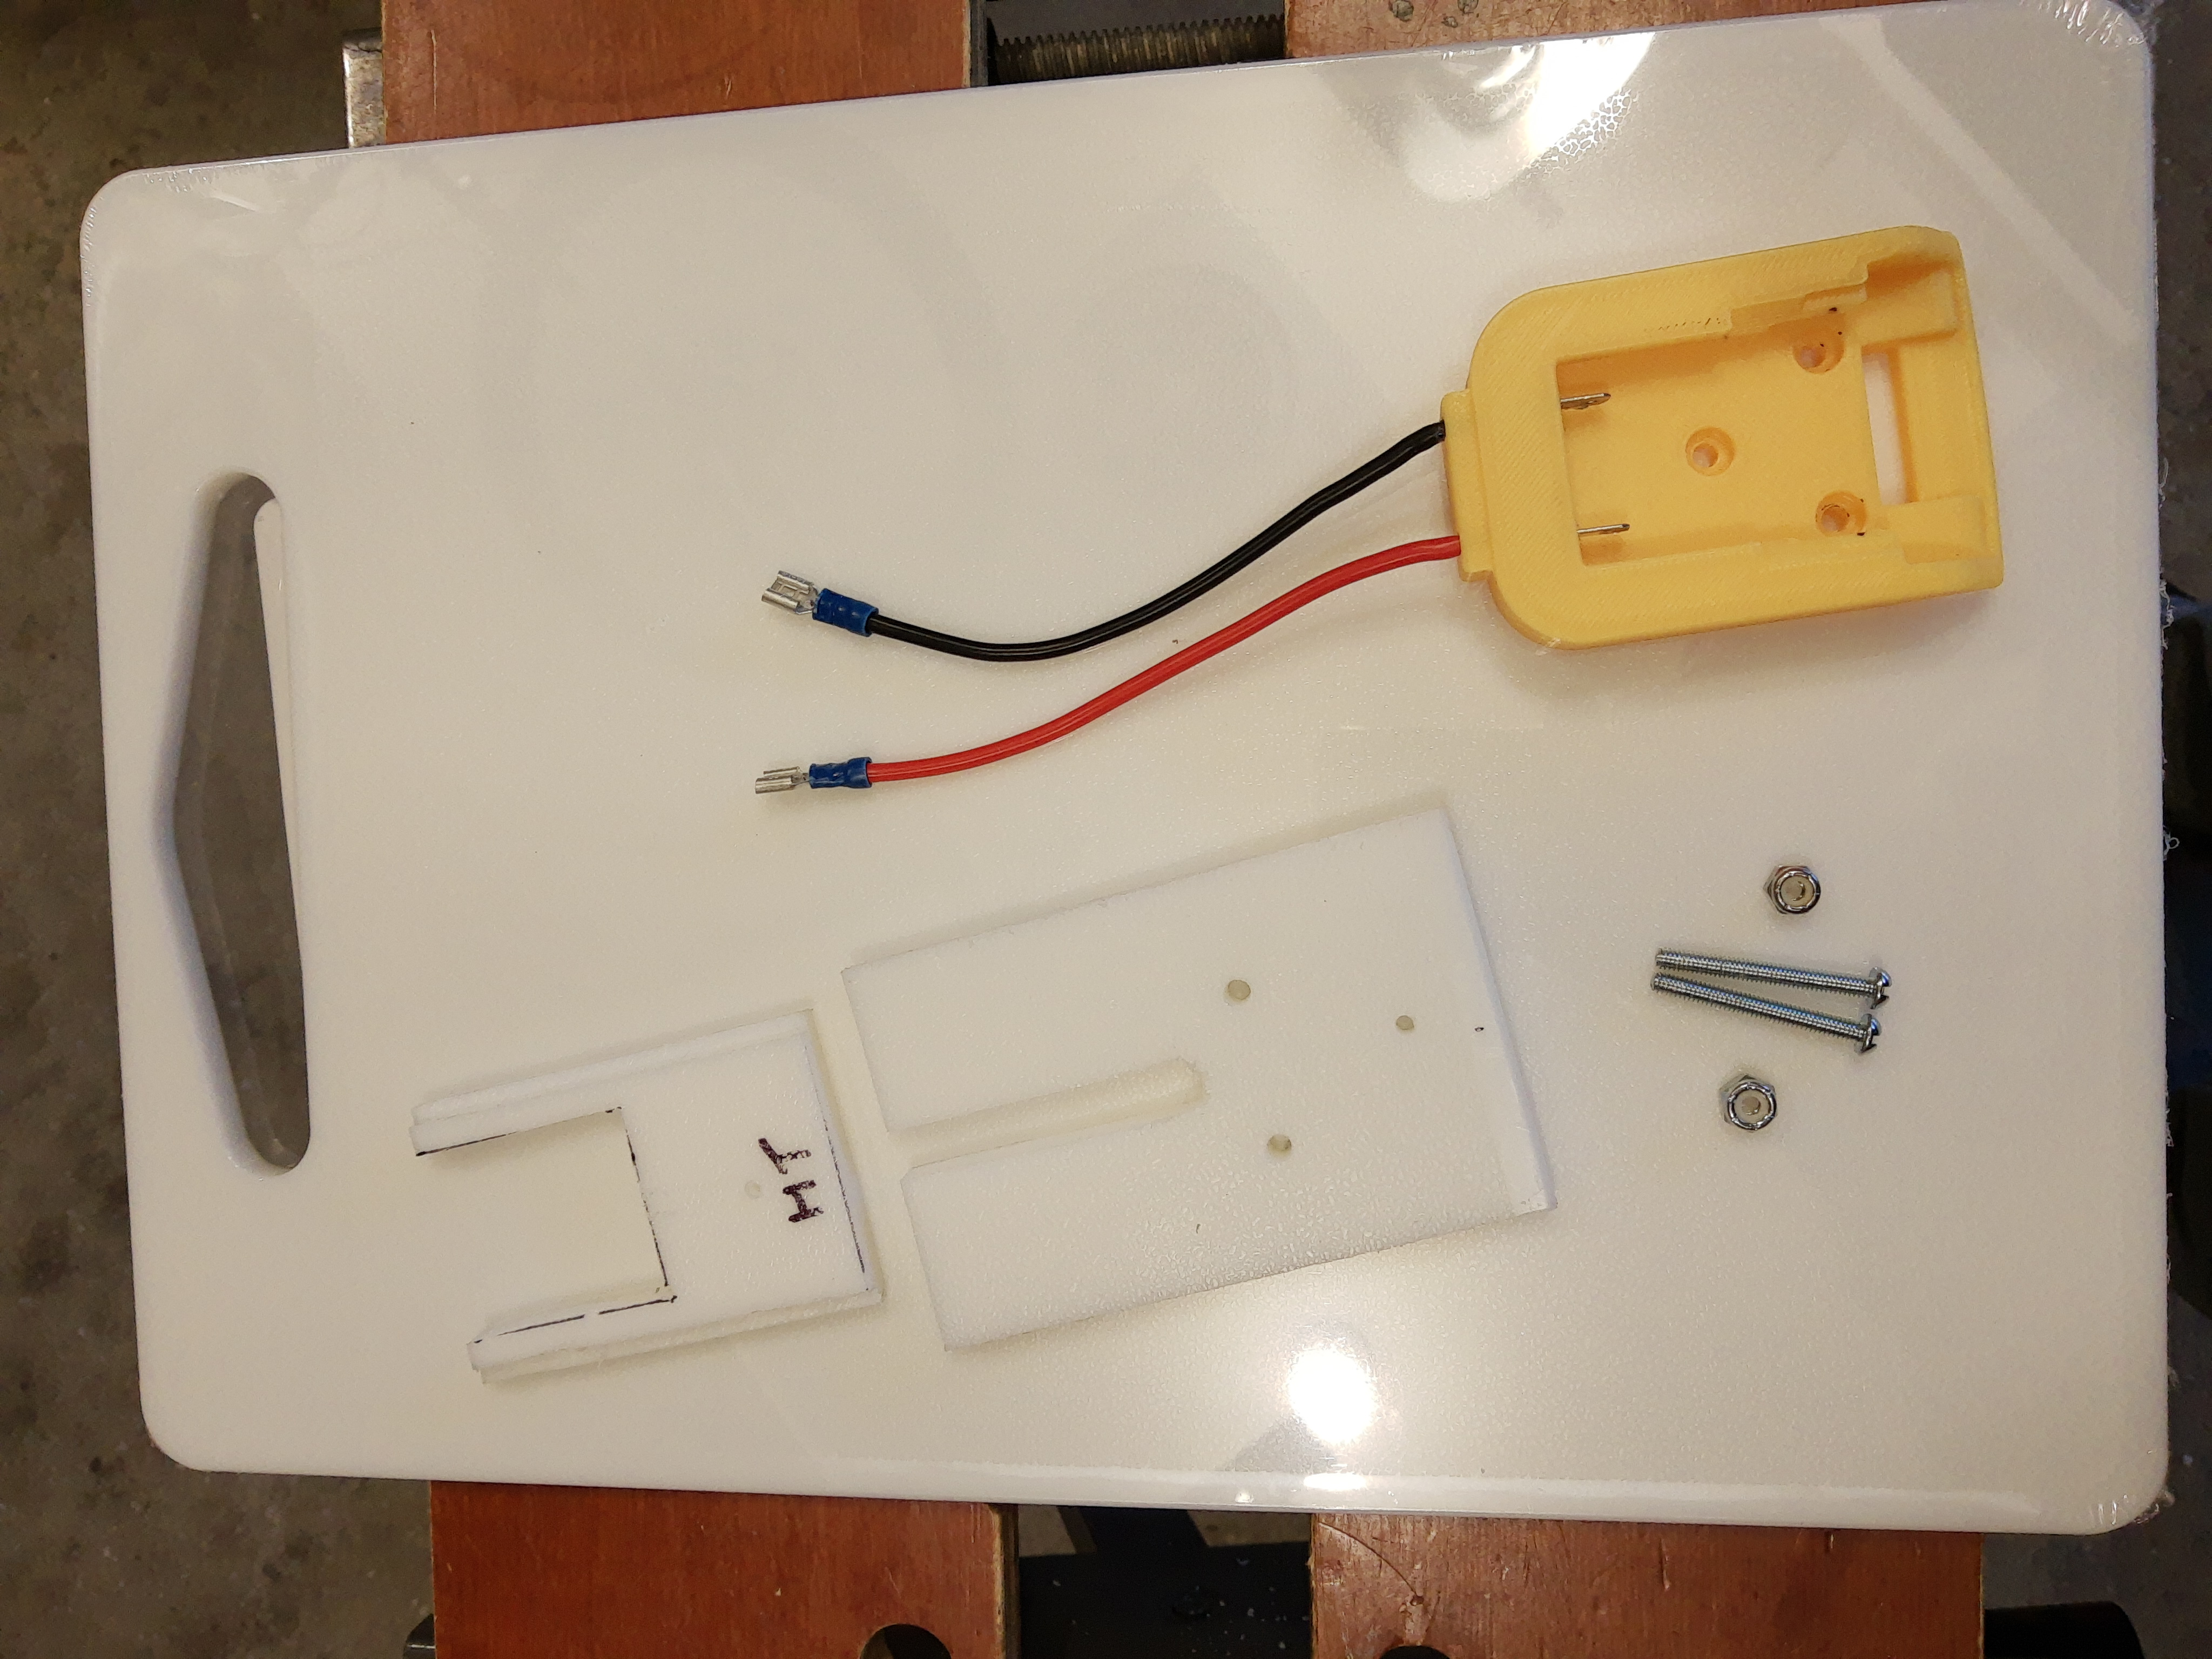
You can see one of the cutting boards, in pristine condition. It turns out I didn't need the second one so I gave it to my dear wife. On the left you can see two plastic pieces cut from the other cutting board. The top one has a large slot cut out of it and rabbets cut on both sides. The larger one below it has a narrow slot and some holes drilled in it. There are two machine screws and Posi-Lok nuts. These machine screws are only 1-3/4" long, and are from my parts collection. And finally, there is the connector for the DeWalt battery. The two wires have been shortened and blade connectors crimped onto the ends.
The next picture shows the partial installation in the hedge trimmer. The hedge trimmer is upside down.
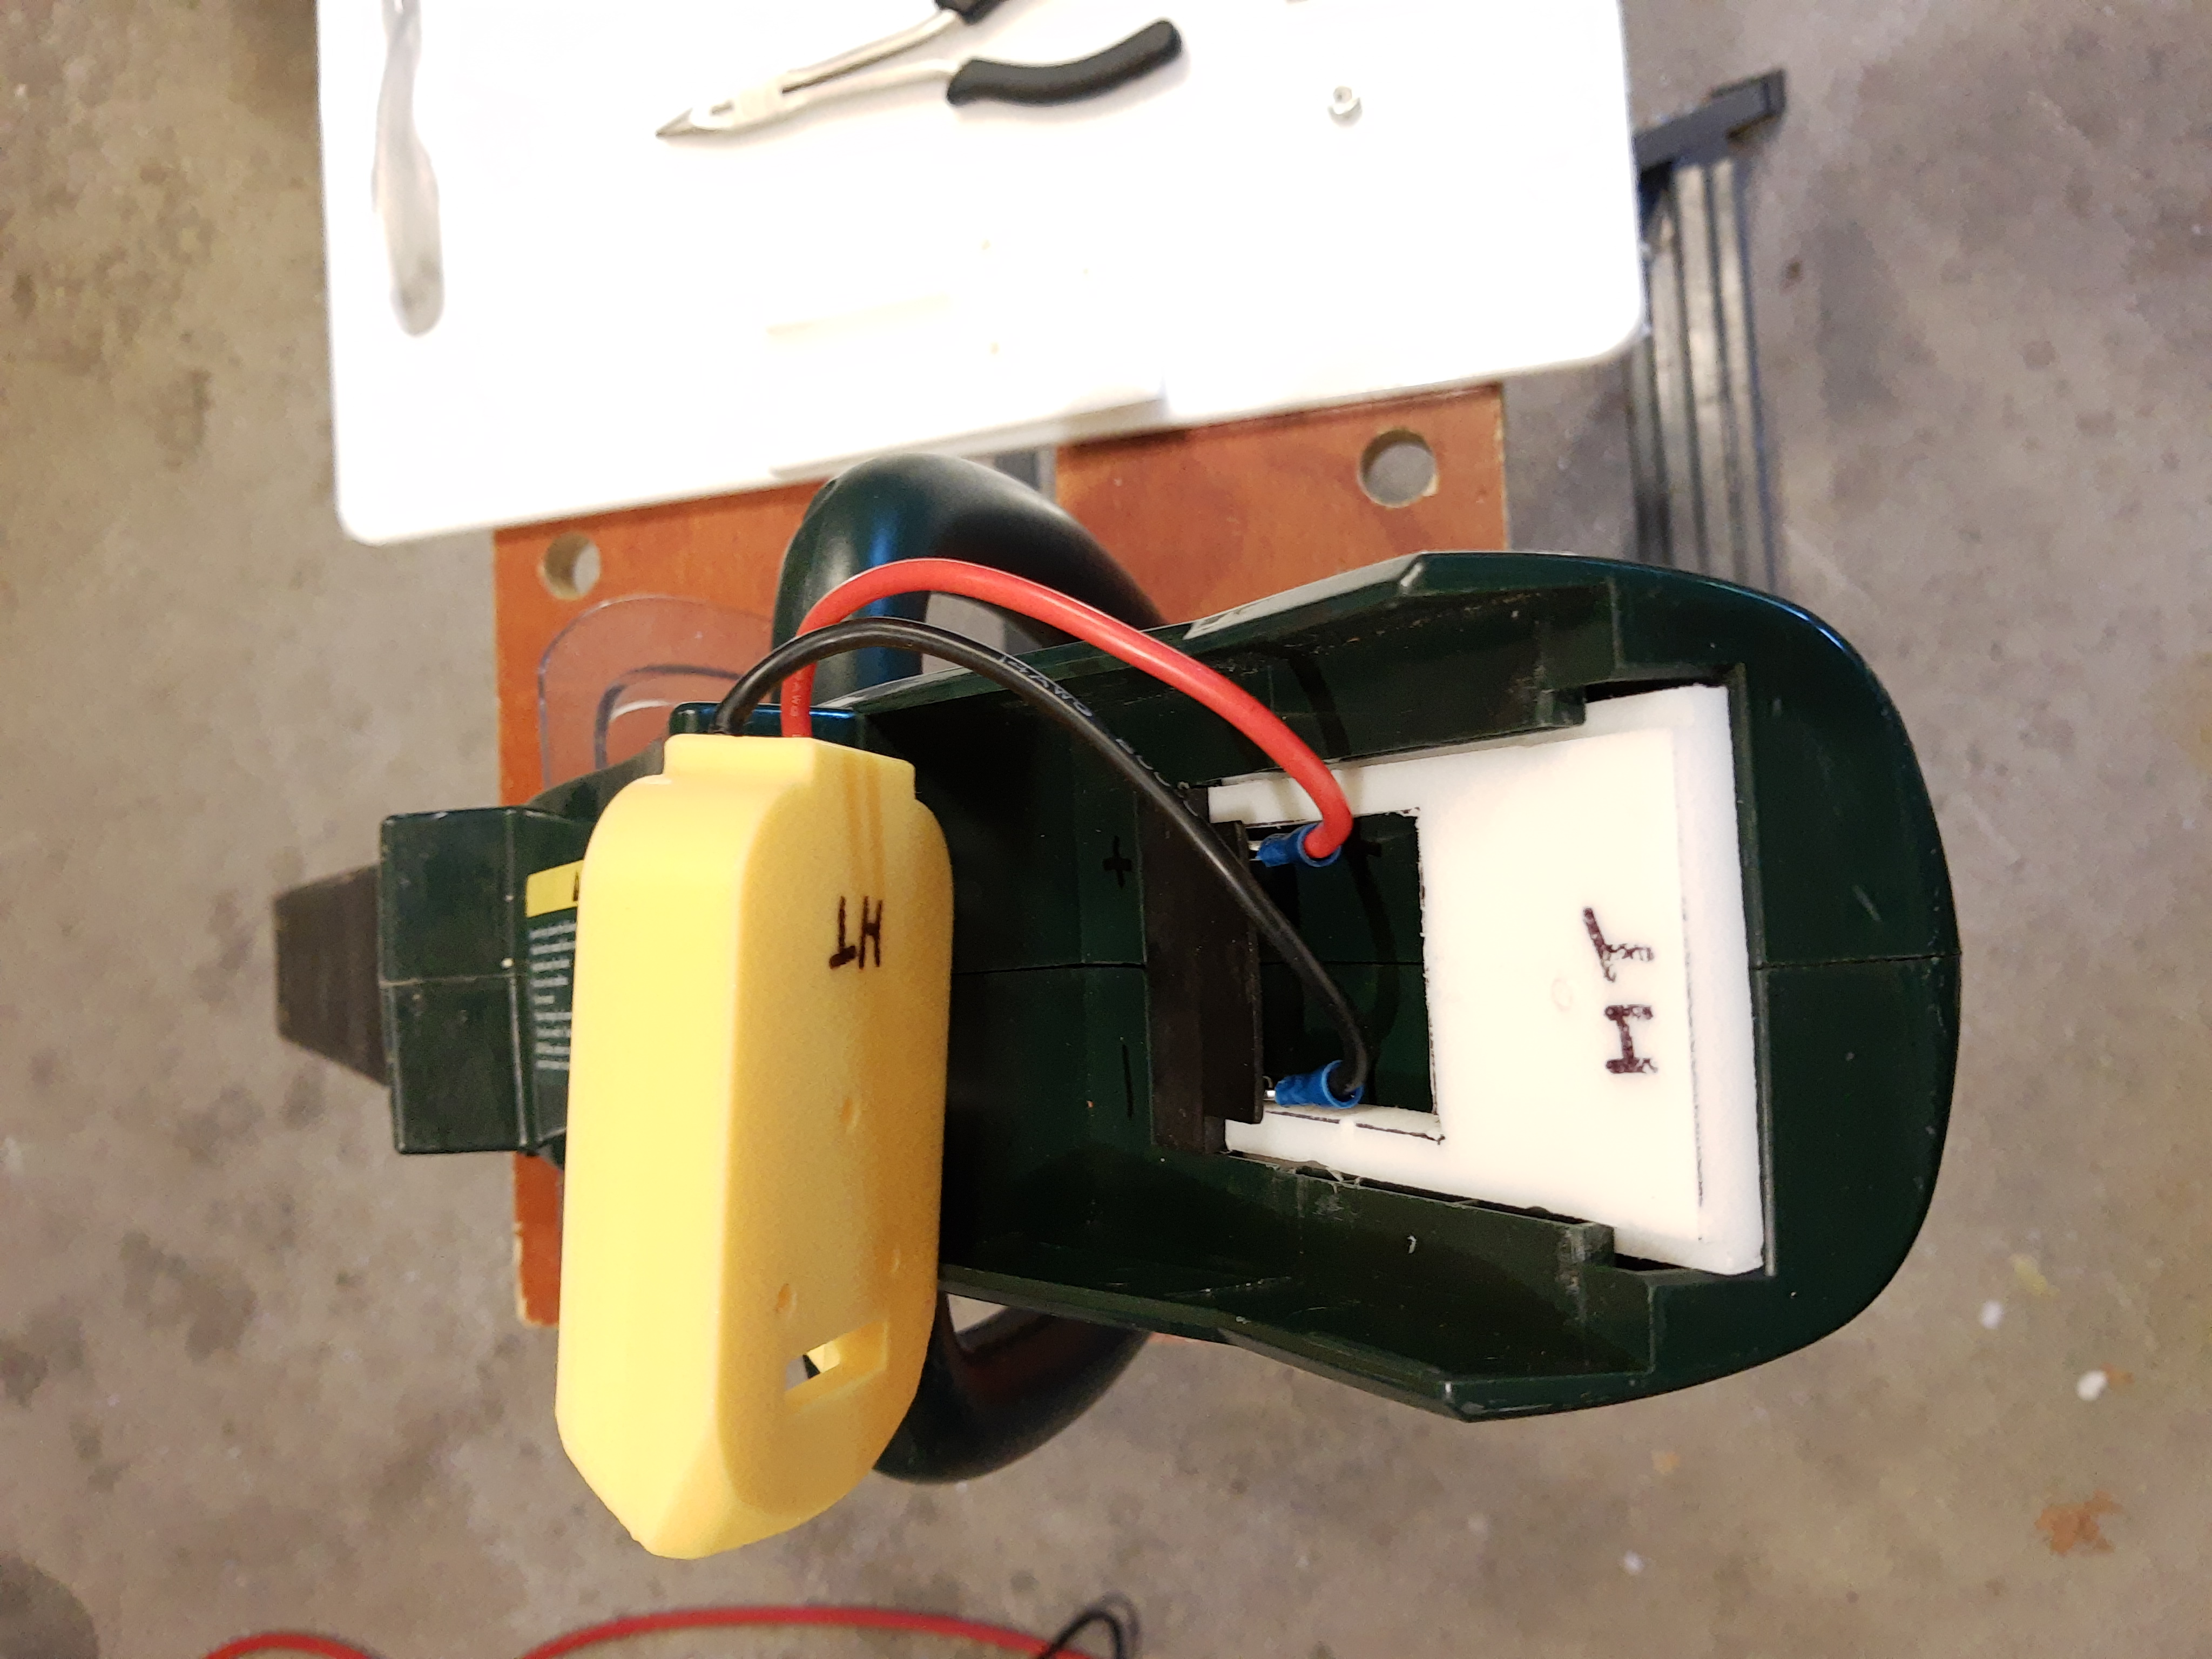
The smaller plastic piece slides into the grooves that normally hold the Yardworks battery. The connectors slide over the contacts which normally fit into the Yardworks battery. The larger plastic piece goes over the top of the smaller plastic piece and the rest of the Yardworks battery tray. The wires nestle into the slot in the larger piece and the battery connector rotates counter-clockwise and sits on top. One thing that is not shown is a short flat-head wood screw which goes through the large plastic piece and connects to the hole in the small plastic piece. The machine screws then go down through the battery connector, the large plastic piece and the body of the hedge trimmer and come out under the handle. The Pozi-Lok nuts are smooth on top so they won't injure the hands of the person holding the handle of the hedge trimmer.
The final picture shows the hedge trimmer with the parts and a DeWalt battery installed. The hedge trimmer is rightway up.
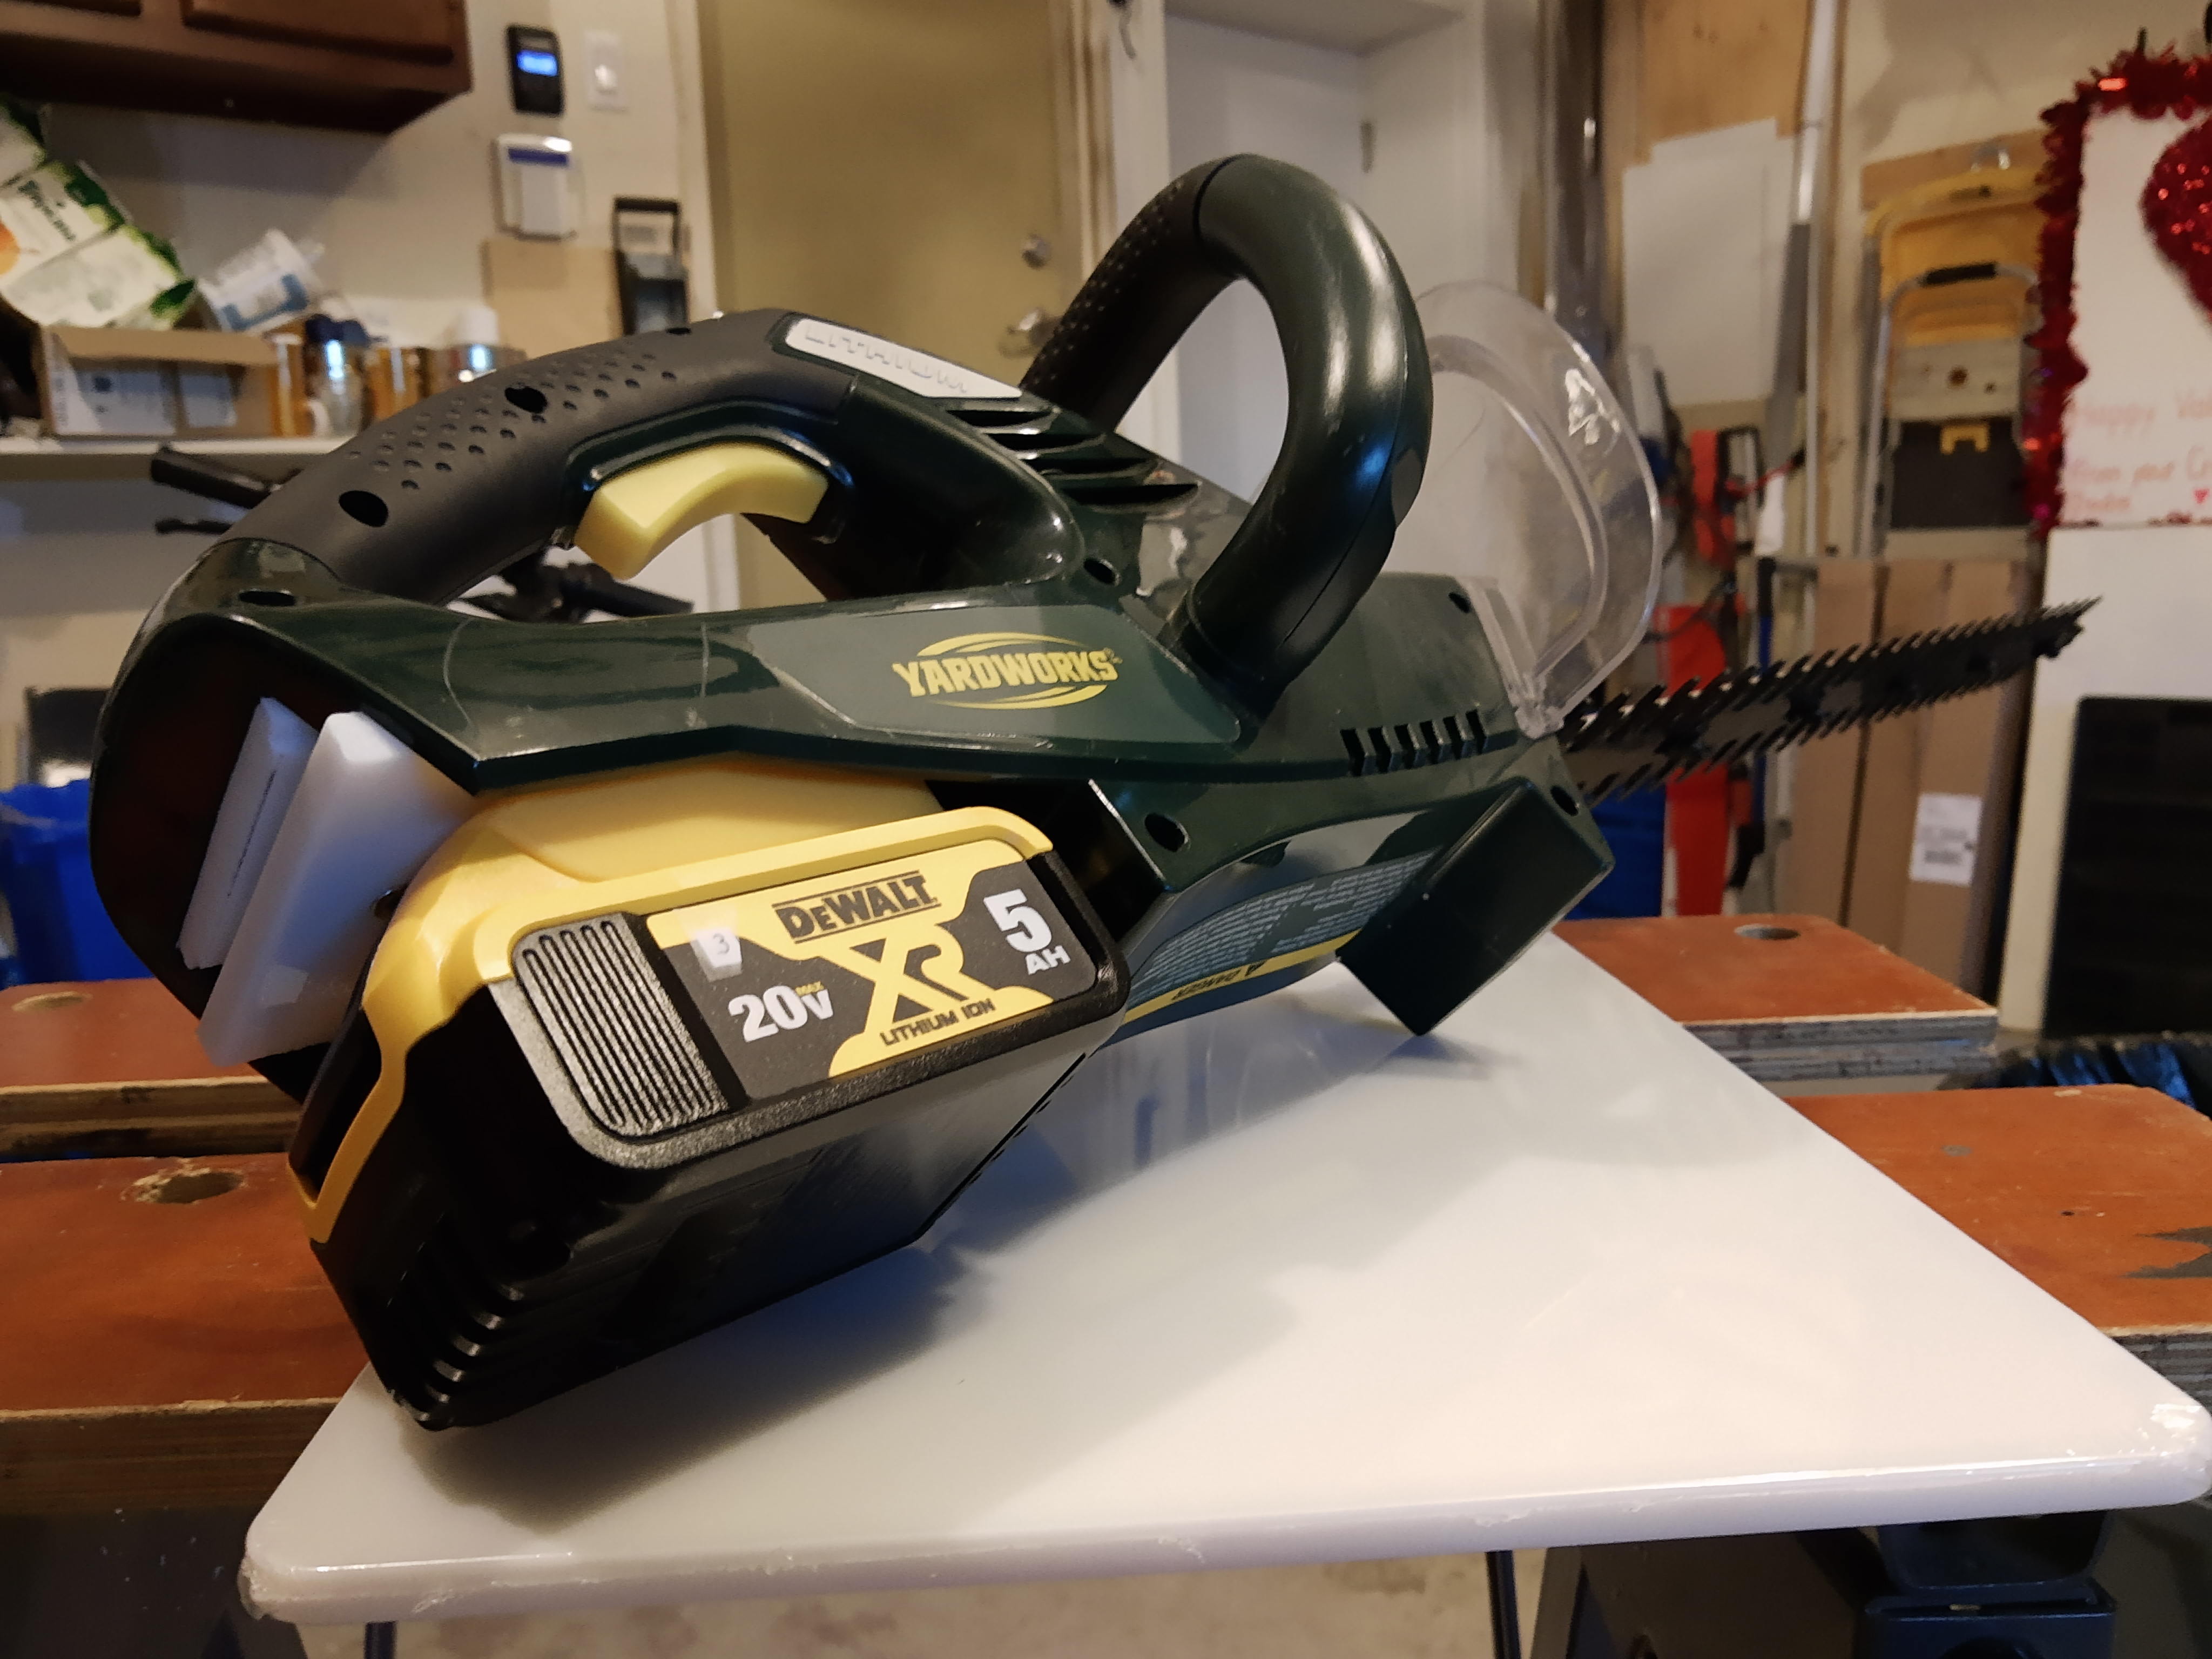
From the top down on the left hand side you can see the hedge trimmer, the small plastic piece, the large plastic piece, the battery connector and the DeWalt battery all sitting on top of the spare cutting board.
I did a similar installation for the Yardworks String Trimmer / Edger. It has a deeper battery compartment so I cut three of the larger pieces so the wider DeWalt battery would clear the edge of the trimmer. The top and bottom pieces have holes drilled in them and the middle piece has a slot cut into it between the holes for routing the wire. The Pozi-Lok nuts ended up inside the housing of the trimmer. I was able to disassemble the handle of the trimmer a little and reach into it with a pair of long needle-nose pliers to get the nuts on the ends of the machine screws. A little bit of laparoscopic assembly.
It was an interesting project. I had to make things up as I went along and also had to allow myself to change my mind as I figured things out. I think by the end I was up to "Plan W"!